Pro Tips: The Best, Most Frustrating Exercise that EVERYONE Can Benefit From
Written by Eric D'Agati FMS Pro Tips
What if there was one drill that could be used to improve mobility, stability and motor control, strength AND power??? That would definitely be a tool that I would want in my toolbox.
So what is the magical exercise?
<== Video for x201L7jO ==>
The Single Leg Deadlift is that high-value training tool that can be used in so many different ways to achieve a relatively long list of various goals if implemented properly. The challenge is that this drill is often extremely frustrating not only for the trainee trying to learn and execute, but also just as exasperating for the trainer, coach or therapist to try and teach.
To help solve this dilemma, I put together the following video series to help clear up some of the confusion, as well as provide a road map of progressions to make sure you are choosing the appropriate degree of challenge, as well as some cool tricks to expedite the learning process.
First, we will discuss the foundation of the movement as a single leg hip hinge and its relationship to the Active Straight Leg Raise pattern. Many will get caught up in looking at the ”parts” involved, especially the hamstrings, rather than seeing it as a whole integrated movement pattern. In the Single Leg Deadlift we are simultaneously looking to create dynamic hip hinging, flexing on the down/planted leg, while keeping relative extension on the up/reaching leg, all of this while keeping a neutral spine and solid trunk position.
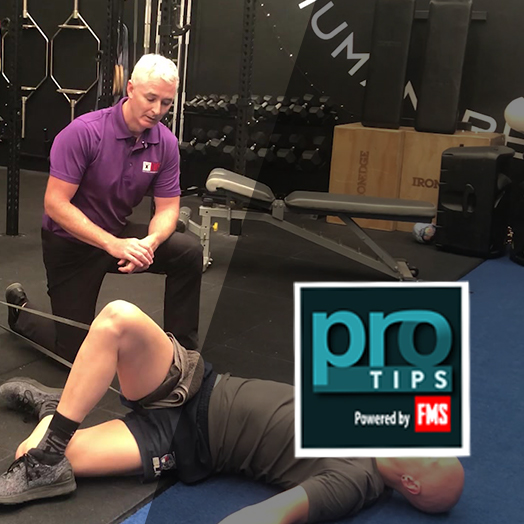
This first video will show how we can honor the developmental movement sequence by starting with drills done supine on the floor, progressing up to half keeling and finally to standing. Starting on the floor, we have two pathways to consider addressing both “sides” of the pattern. The first would be the flexion component, where we would implement drills such a Single Leg Lowering progression and the Leg Raise with Core Engagement. On the flip side, don’t forget there is also a potential extension aspect involved, and so variations and progressions of hip bridging are well suited to introduce extension and teach the difference between hip extension versus lumbar extension. Since it is a unilateral pattern, single leg versions of both extension and flexion drills will be most beneficial, especially since it also creates an opportunity to recognize right/left imbalances.
Single Leg Deadlift

The next foundational position to progress to is now half kneeling since it represents flexion on one side and relative extension on the other, even though the knees are both bent to 90 degrees, which is fine since our primary focus is at the pelvis. Learning how to properly distribute weight and balance in half kneeling can be a drill in itself and then from there you can progress to adding various forms of perturbation such as Kettlebell Halos, Head or Trunk Turns, Chops and Lifts.
Part 2
In Part One of this series, we introduced the Single Leg Deadlift as a sort of “Swiss Army Knife” of exercise interventions since it can be used in so many applications for a variety of different goals. It was also discussed how the Single Leg Deadlift relates to the Active Straight Leg Raise pattern and how we begin corrective interventions on the floor and then progress to half kneeling and finally up on to the feet.
<== Video for 4nPqJg5j ==>
Now that we are ready to get up on our feet, we will actually intervene with a great static drill I call the “L Hold”. This drill sets us up at the bottom of the Single Leg Deadlift where we can feed any flaws that may be present to create awareness, making it easier to appreciate and adjust rather than trying to do it on the move. The most common flaws starting at the foot is the valgus collapse of the foot and/or knee, which can be addressed by teaching proper foot grab, as well as drawing attention to the knee diving in via Reactive Neuromuscular Training (RNT). RNT drives the knee in even further manually with a band to create awareness and feedback. Moving up to the hips, it is common to see the pelvis and trunk rotate towards the open side or the reaching leg. A similar RNT approach can be taken using a band wrapped around the trunk or manually rotating the hips away from the plant leg. Last, but certainly not least, is the cueing of the hand behind the low back to monitor a neutral spine to make sure that the hinging is done at the hips rather than the spine. A cue that is often helpful is to encourage the trainee to try and bring their chest to the wall in front of them and their rear heel up and back to the wall behind them.
From this point we then start the transition from a “Corrective” drill to a “Conditioning” exercise and begin to introduce load via a kettlebell, cable, dumbbell, barbell, cable or band. Depending on your loading parameters, speed, etc., we can adapt this into a vehicle to create strength or power. My favorite variation for strength is using a single kettlebell, holding it in the same side as the reaching leg. Because of the height of the handle of the kettlebell, it allows the trainee to start the weight from a cold stop from the floor, allowing for minor adjustments between each reps. Transitioning to power can be done by changing over to a medicine ball which can be used to slam from top to bottom as shown in the video or in reverse as a deceleration “catch”. Both of which are great for training deceleration of hip flexion in standing as seen in the lead leg of a baseball pitcher for an example. As I mention in the video, there are literally countless variations we can choose from and with the tips shown here it will hopefully make it much easier for you to make this great exercise a staple of all of your programs.
Author

Eric D'Agati has been serving as a coach and teacher in the fitness and performance industry for over 20 years. His experience includes working with high-level athletes and teams in multiple sports, including professional soccer, the National Hockey League, National Professional Fastpitch Softball, Major League Baseball, and the National Football League. Eric has also been a lead instructor for Functional Movement Systems since 2006, teaching workshops around the world for top organizations including the Navy Seals, Mayo Clinic, New York University Medical and appeared in the NY Times bestseller “The 4-Hour Body” by Tim Ferriss.


Related Resources
Please login to leave a comment
5 Comments
-
Mark J Vleck 10/7/2019 12:49:54 PM
Good insight, thank you.
-
Kara 10/7/2019 12:48:38 PM
great article :-)
-
Patrick 12/9/2019 1:45:50 PM
A great video series from Eric. I was just working clients this morning on single leg deadlift using a set of TRX straps as a regression for practicing the single leg hip hinge, and it wasn't as effective as I had hoped. I'm excited to try the box or platform on the back leg, static at first, to help build awareness of what's happening in the back knee, as well as hip positioning in the saggital and transverse planes. Thanks, Eric!
-

Joel Anderson 12/9/2019 1:45:50 PM
Excellent tutorial on ASLR corrective and conditioning exercises. Progressions and regressions were tremendously helpful.
-
Fei Ye 12/9/2019 1:45:50 PM
thanks for sharing